출처 : 마이크로소프트 엣지 재설치 2분이면 완료 (tistory.com)
마이크로소프트 엣지 재설치 2분이면 완료
안녕하세요, IT 보기 입니다. '마이크로소프트 엣지'는 윈도우10에서 사용하는 웹 브라우저 입니다. 기존 인터넷 익스플로러보다 가볍고 빠르며, pdf 같은 파일도 보기 편하고 노트북, pc, 태블릿
honeysoju.tistory.com
■ 오류 현상
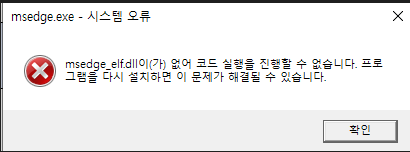
- 엣지관련 시스템 오류 발생
: "msedge_elf.dll이(가) 없어 코드 실행을 진행할 수 없습니다. 프로~~~" (이미지 참조)
- 최신 버전으로 업그레이드 했으나 동일 증상
- 프로그램 다운로드 후 재설치 했으나 동일 증상
■ 해결 방법
- "Windows PowerShell"을 관리자 권한으로 실행
- 사용자 폴더로 이동
PS C:\> cd ~ - 재설치 명령어 입력
Get-AppXPackage -AllUsers -Name Microsoft.MicrosoftEdge | Foreach {Add-AppxPackage -DisableDevelopmentMode -Register "$($_.InstallLocation)\AppXManifest.xml" -Verbose} - 재부팅 후 확인 (재부팅하지 않으면 오류가 해결 되지 않음)
'S.W. > Microsoft' 카테고리의 다른 글
| [Microsoft/Exchange] Exchage 2010기준 사용자 사서함 내보내기(.pst) (0) | 2021.09.09 |
|---|---|
| [Microsoft/Exchage] Exchange Server 빌드 번호 및 릴리스 날짜 확인 (0) | 2021.09.09 |